Thursday, February 13, 2014

Grandma Iverson Cookies

My post this week takes a cross-family turn.  I mentioned in a previous post that recipe trading was a regular occurrence at gatherings which often included  members from both sides of my family. My featured recipe today is in Gram's recipe box but comes from my great-grandmother Jesse Corbin Iverson.  She is my mom's maternal grandmother.

Jesse Corbin, 1909
I remember Grandma Iverson well.  I was six when she passed away at age 96.  By that time her mobility was pretty limited, she was all but deaf, and spent her days napping and reading in her favorite chair.  I recently learned more about her life as a young woman on the Montana prairie, and I wish I would have had the opportunity to talk to her about it first hand.

Photography and scrapbooking are my other hobbies, and I had the great fortune of discovering a treasure trove of family history a couple of years ago when I went through Grandma Iverson's photo albums.  What I learned might just be my next online project  - her photography documenting life on the Western Plains is nothing short of fantastic.  Through Grandma's photos I felt I got the chance to meet her has a young woman and gained insight on her life and family I hadn't previously had.  What a gift she left us!

Corbin's New House on the Homestead
Circa 1912
My great-grandma had moved to Montana from Illinois with her family in 1909 at age 27.  The Corbin family homesteaded in a place that can only kindly be described as God's Country, southeast of the cowboy and sheep town of Roundup.  Even now it is mostly sage brush, rock and dry rolling hills as far as you can see.  It was a pretty hardscrabble life for a family of 8 kids - some of whom were already grown - and their parents.  They lived off the land and worked it as a family.  As the siblings grew older and married, some stayed for a while but all eventually left except for Grandma and her younger brother Louis.  Her parents went back to Illinois.  Grandma had married in 1914 and stayed on the homestead where she raised three children (two others died by age 3) until her 80's when she moved into town with her daughter, my grandmother Ellen.   My aunt and uncle still live, farm and ranch on the "home place".

Grandma was not known for her cooking skills.  As a matter of fact, I've heard it said that everyone calls this recipe "Grandma Iverson Cookies" because that was all she knew how to make.  I guess if you can only do one thing, it should be good, and thankfully this is!

I likely never ate any of these cookies that were made by Grandma herself - she was probably done baking by the time I came on the scene, but many members of my family make them, each with slightly different results - all delicious!  One aunt has the reputation for recreating them most accurately.  There are a few theories as to why the results vary - the most plausible is that only making them by hand results in the Grandma I cookie most akin to the original.  This makes sense of course because Grandma certainly didn't have a Kitchen Aid on her counter!  The last time I creamed butter and sugar by hand was high school Home Ec.  No thank you . . . My Grandma I cookie turns out moist, soft and chewy and pretty darn delicious if you ask me.

GRANDMA I COOKIES
1 -2 C raisins ( I use 2)
1 C boiling water
1 tsp baking soda
2 C sugar
1 C shortening (I use butter)
3 eggs
1 tsp banilla
4 C flour
1 tsp baking powder
1 tsp salt
1 tsp cinnamon
1/4 tsp nutmeg
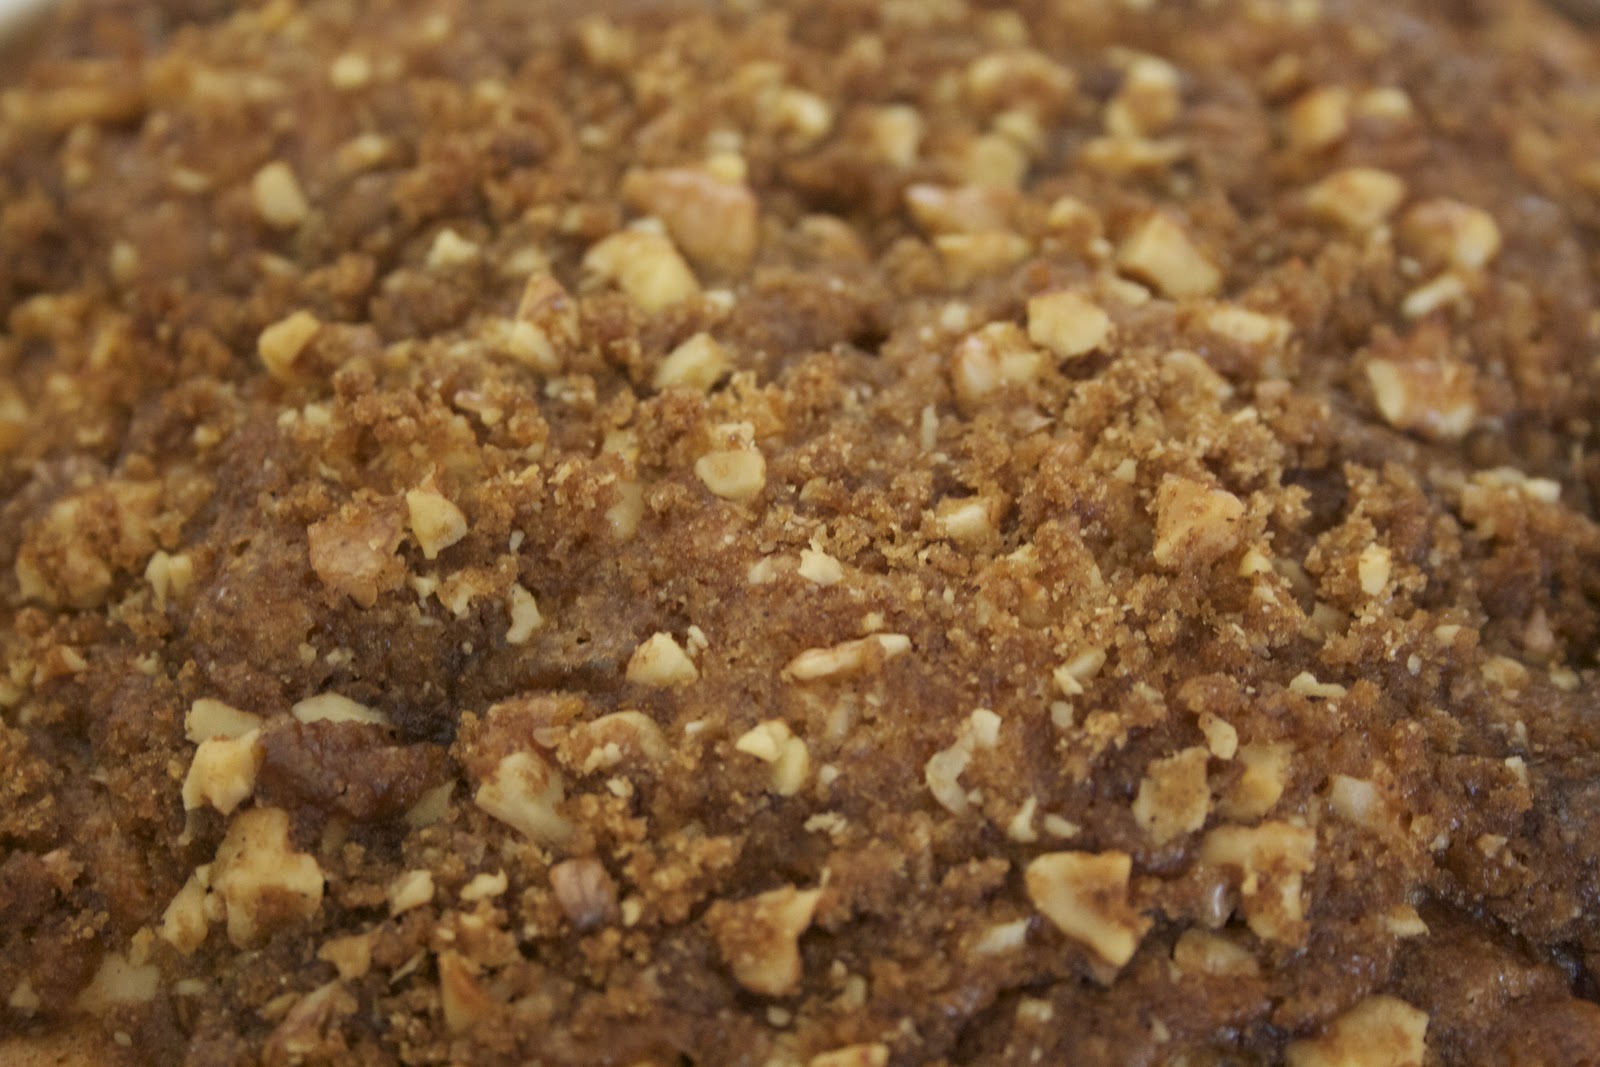
1 C walnuts (optional).

Preheat oven to 425 degrees.

In a smal saucepan combine water and raisins and bring to a boil over med-high heat on stovetop.  Cook for five minutes.  Set aside and let cool.  Add baking soda, let stand.

If you're game - cream butter and sugar by hand in a mixing bowl with a wooden spoon.  Otherwise, with a handheld or stand mixer, cream shortening and sugar until light and fluffy. (about 3-5 minutes with stand mixer).  Add eggs one at a time until combined, add vanilla and raisins with liquid.  Mix well.

Sift together flour and remaining dry ingredients.  Add to shortening mixture and mix until fully incorporated.  Stir in nuts if using.

Using 1 1/2 inch scoop drop dough on parchment or Silpat lined cookie sheets two inches apart.  Bake until thoroughly golden brown about 12 - 16 minutes, rotating baking sheets half way through.  The cookies will start to brown quickly but don't be tempted to take them out too soon. Makes 5 dozen.


Space 2" apart, they will spread


Rotate baking sheets half-way through baking
They're done when perfectly golden all over 

Enjoy!


Tuesday, January 28, 2014

Best Gingerbread (Over 100 Years Old)

I have mentioned in a previous blog the love affair that Scandinavians have with Gingerbread.  Food historians have traced gingerbread to originate in Armenia, then to Germany, and from there to Sweden where it was loved for its flavor and medicinal qualities.

This week's recipe for a simple gingerbread cake was a staple at Gram's house, it wasn't reserved just for the holidays even though most of us think of it as a Christmas flavor.  Gram probably made at least twice a month, it was rare we went more that a few days without having it with coffee or for our dinner dessert.

When I first found the recipe I got a little excited because it was noted on the card that the recipe was over 100 years old.  Gram's type-written card would have dated back to the 40s or 50s so by now this recipe is probably near to 200 years old.  Because of the pervasive ginger love among Scandinavians, I thought perhaps the recipe may have belonged to Gram's Mother, who might have brought it over with her when she immigrated.  Could it be I had an authentic old country recipe in my hot little hands?

Sadly, no.  It didn't take long to trace the origins of this recipe to a 1935 magazine advertisement for Brer Rabbit Molasses at a great website/blog Recipecurio.com.  While disappointed the recipe wasn't the family heirloom I was hoping for, it was fun read the ad and the recipecurio website is a real find!

There are some minor differences between the original recipe and Gram's.  The original recipe called a 50/50 split of butter and lard.  Gram's recipe called for shortening.  I used all butter.  The cooking time on the original was slightly less than what was on Gram's.  I was pleased to see this because a few previous attempts had resulted in dryer gingerbread than I remember Gram's being and I was planning on a trying a shorter cooking time anyway.  The last difference is that Gram had hand-wrtten "combine molasses with hot water" on her card, where as the original said to add the molasses before the dry ingredients, and then the hot water last.  I followed Gram's instructions.  Maybe one day I'll make both side by side to see if the two different methods would result in noticeably different cakes.  I'd be curious if anyone knows what the difference would be - I tried to research it but couldn't find any scientific explanation why one would be better than the other.  Maybe I'll try to email Alton Brown or the Science Editor at Cook's Illustrated.

I find myself without a square baking pan at the moment so I made this in a 10" round, which turned out fine except as a matter of preference I do like square piece of this cake better than wedges - it is after all a "snacking cake" which would suggest you can eat it with your hands.  I think squares just work better for that.  And for those of us who like corner pieces with a bit of extra crispy crunchy edges, obviously a round pan is sorely lacking corners!

Round or square, this cake it super easy and quick to make.  You probably have everything you need in your pantry so give it a try.  On a recent very cold day, I made it while my daughter was napping and she and I had a nice little afternoon snack with cup of hot chocolate.  It turned out moist and dense and was the perfect way to warm up!

BEST GINGERBREAD (OVER 100 YEARS OLD)
1/2 C shortening (I used butter)
1/2 C sugar
1 egg
2 1/2 C flour
1 1/2 tsp soda
1 tsp cinnamon
1 tsp ginger
1/2 tsp cloves
1/2 tsp salt
1 C molasses
1 C hot water

Heat oven to 350 degrees.  Grease and flour 9X9 square baking pan.

With a standing or hand mixer, cream together butter and sugar until light and fluffy (about 5 min with standing mixer).  Add egg and mix until fully incorporated.

In a large bowl, whisk together remaining dry ingredients.  In a two cup glass measuring cup, heat water in microwave two to three.  Add molasses to hot water and stir well.

Add flour mixture to butter mixture in three additions, alternating with molasses in two additions until fully combined.  Pour batter into prepared ban.  Bake 40 minutes.

Let cool completely on cooling rack.  Serve with fresh whipped cream, sprinkle with powdered sugar, or enjoy plain.  Makes 15 servings.


Thursday, January 16, 2014

White Cookies With Date Filling & Orange Scented Glaze


If the idea of dates in a cookie doesn't sound appealing to you, I can relate.  Much like the last post for Sour Cream Cookies, I had a real lack of appreciation for Gram's Date Cookies growing up.  I now really like dates so I wanted to give this recipe a try.  If you're not convinced, I offer alternatives to the dates later in the post.  

Right away I ran into a stumbling block - looking through Gram's cookie recipes, it wasn't obvious which recipe I had in mind.  Gram's recipe box had several recipes for date cookies, so it took me a bit of study to conclude that one labeled "White Cookies" was probably my best bet.  It is noted that the recipe came from Olia, Gram's sister and my favorite Great Aunt.

Reviewing each recipe made me realize that Gram has a number of recipes that have dates or raisins but here are none that call for other types of dried fruit except the occasional "glazed candied fruit" which is the red, yellow and green pieces you see in traditional fruit cakes.  How fortunate we modern bakers are to have such a wonderful variety of dried fruits at our disposal - everything from exotic tropicals to organic and conventional staples.  

For those readers interested in food history, the use of dried fruits is pretty interesting.  Not surprisingly it started in ancient Mesopotamia first with raisins, dates, and figs and over time spread into Europe.  Often, preserving and drying fruits was key to survival during winters and hard times as they are packed with nutrition.  I'll stop there with my digression on date history, a nice overview can be found on Wikipedia.     

Another similarity to my last post is that this recipe is just a list of ingredients with no instructions.  To take the challenge a bit further, the quantity of flour is "enough to roll". The filling is just "date filling" - no ingredients!  Really Gram?  Per usual I did some searching for a similar recipe to get a baseline to get started and found one at www.eatliverun.com. That was a good place to start for the cookie, and I had some ideas about what I would do with the filling based on an Italian fig filled cookie (Cuccidati) I make.

My intention when starting this blog and baking effort was to recreate Gram's baked treats as strictly as I could, so I am a bit conflicted with with my approach to preparing this recipe.  The end result is my own interpretation.  I kept the cookie sacred, but I updated what I remember Gram's filling to be, and at my #1 taster's suggestion, I added a light glaze for a bit of extra sweetness and to compliment the filling.   I'm a big fan of Mediterranean and Middle Eastern flavors.  Since dates originated from that part of the world, it was a natural instinct to use those influences in putting together the filling and the orange scented glaze.  In the end, they turned out delicious and despite the differences, very reminiscent of what I remember of Gram's.

For those of you - and I know there are many - who are not fans of dates, apricots would be an excellent substitution for the dates in this recipe.  You could also use your favorite jam to fill them.  Whichever you choose, I know you'll enjoy them on your coffee break!

WHITE COOKIES
1 egg
1 C sugar
1 C sour cream
3/4 C butter
1 tsp baking soda
1 tsp baking powder
3 C flour, plus more for rolling

DATE FILLING
1 C chopped dates, packed
1/4 C honey
1/2 C water
1/4 C finely chopped almonds
1/8 tsp cinnamon
1/8 tsp cloves
1/8 tsp nutmeg
zest of one orange

ORANGE GLAZE
2 C powdered sugar, sifted
2-3 T fresh squeezed orange juice
2T butter, softened

For the Cookies:
Cream together butter and sugar until light and fluffy, about 5 minutes with the paddle attachment on a standing mixer.  Add the egg and vanilla and mix until just combined.  

Whisk together the flour, baking powder, baking soda and salt.  Add dry ingredients alternately with sour cream in three additions, starting and ending with the flour mixture.  Mix until soft dough forms, divide dough in two equal parts, then wrap dough in plastic wrap and refrigerate for 2-4 hours, or overnight.


For the Filling:
Add all ingredients to a small saucepan on high, bring to a boil.  Reduce heat to med-low and simmer until thickened, about 5 - 7 minutes.   Let cool completely.

For the Glaze:
Combine all ingredients in a medium mixing bowl and stir briskly until smooth.  If needed, add additional sugar to thicken, or orange juice to thin.

Assemble and Bake Cookies:
Preheat oven to 375 degrees.  Starting with one dough disk (leave the second in the fridge until needed) roll out on well floured surface to 1/8" thick.  It's important to get the dough this thin - the end result puts two together, so you don't want to end up with an cookie that is too thick.  The dough may be a bit sticky, if necessary kneed a bit more flour into dough, taking care not to overwork.  Cut with 2 - 2 1/2 inch round cookie cutter (I used 2 1/4 in).  Place dough circles on parchment or Silpat lined cookie sheet, spacing 1 inch apart.  Place scant teaspoon of filling on cookie, then place another circle of dough over top.  Crimp tightly to seal.


Bake cookies 10 minutes, turning baking sheet halfway through.  Cookies should be lightly golden around the edges.  Transfer to wire racks and let cool completely.  Top with orange glaze.


Tuesday, January 7, 2014

Sour Cream Cookies With Brown Butter Icing


This week's post is a lesson on the maturing of taste - at least my taste.  Gram's Sour Cream Cookies are a family favorite - everyone absolutely raves about them.  Everyone but me, that is.  I'm not crazy about nuts in most sweets, and walnuts are a key ingredient in these cookies.  I've posted before that I was not always a fan of brown butter icing, so as far as I was concerned these cookies had two strikes against them.  My 10 year-old self probably told anyone who would listen that I wouldn't eat these cookies if they were the last cookies on earth.   That is a ridiculous statement of course because there is no way I wouldn't eat the last cookie on earth, no matter what kind it was.  

Now that I've accepted brown butter icing as one of the better things in life, I've for some time wanted to try my hand at this recipe to see if I might have grown into their "grown-up"taste.  If not, I knew I'd have plenty of eager eaters to pick up my slack.  I hesitated for a while because it is one of the many recipes from Gram's box that is simply a list of ingredients.  I knew I might need some time to experiment in case my first batch didn't turn out so well.  

For research I did a quick look online for similar recipes.  I found a nearly identical one at Food52.com which I used as my baseline for time and temp.  Reviewing the instructions from their recipe revealed an assembly process I was familiar with.  I was comfortable that this recipe would fit into what I call the Batter Cookie category.  I'm quite certain I am not the first to come up with that name, there are two - maybe three basic categories in which most cookies can be assigned.  One of these weeks I may blog about that further. 

I also grilled my Mom for as many details as she could remember about the cookies - they are a personal favorite of hers and I'm sure that she's made them dozens of times herself, albeit quite some time ago.  She described them as almost savory rather than sweet, pillowy soft, moist but not dense, and delicate.  Very important was that the walnuts must be chopped very fine, almost pulverized she said.  I remember that Gram actually crushed them with an old Coke bottle rather than chop them.

Once I got started, the cookies came together very easily.  I chopped the nuts but about half way through I regretted not crushing them, as chopping them to the right consistency was a bit time consuming.  I turned on a favorite podcast and got to work. 

As for the results, let me quote my husband:
"You've never made these before."  (Silent pause while he takes first one bite, then two, then finishes the cookie) 
"These are a damn good cookie.  I think they are my new favorite."

And yes, I have grown into these grown up cookies.  I think they are my new favorite.  Thanks Gram.

SOUR CREAM COOKIES
1/2 C butter
1 1/2 C brown sugar
2 eggs
1 1/2 C flour
1/2 tsp baking powder
1 tsp baking soda
1/2 tsp salt
1 C sour cream
1 tsp vanilla
2/3 C + 1/4 C walnuts, separated, chopped VERY fine

BROWN BUTTER ICING
3 C powdered sugar, sifted
7 T butter
3 T+ cream
1 tsp vanilla

For the cookies:
Preheat oven to 350 degrees.  In a large mixing bowl (I used my stand mixer) cream the butter and sugar until light and fluffy, 3 - 5 minutes.  Add the eggs one at a time until mixed well, add vanilla.
In a large bowl, combine flour, baking powder, baking soda, and salt, whisking until well mixed.


With mixer on low, add the flower mixture to butter alternating with the sour cream in three additions (begin and end with flour).  Add 2/3 C walnuts and mix until fully incorporated.

Using 1 1/2 inch scoop, drop batter onto parchment or Silpat lined cookie sheets 2 inches apart. (IMPORTANT: cookies will spread while baking, be sure to space as directed).  Bake 10-12 minutes, turning sheets half way through.  


While cookies are baking make icing (you could do it before making the cookies as well): 
Sift confectioners' sugar into a large bowl; set aside. Melt butter in a small saucepan over medium heat. Cook, swirling pan occasionally, until golden brown, about 3 minutes. Immediately add butter to confectioners' sugar, scraping any browned bits from sides and bottom of pan. Add cream and vanilla; stir until smooth. Spread about 1 teaspoon icing onto warm cookies, then sprinkle with remaining chopped nuts.  If icing stiffens, stir in more cream, a little at a time.

Cookies freeze very well.  In fact, Gram always said they were better after being frozen.Place in large airtight container with wax paper between layers.  
 Thankfully, my daughter has a much more sophisticated palette than I did at that age!

Tuesday, October 30, 2012

Bake Sales and Birthday Cakes

Although I didn't dip into Gram's recipe box last week, I did do a fair amount of baking so I'm taking a bit of a departure from my typical format for this post.  I volunteered to make some cookies for a bake sale table and it was my husband's birthday so my oven and mixer were busy!

For these endeavors, I selected recipes from two of my favorite celebrity chefs whom I feel are among the most reliable sources I've found - Martha Stewart and Alton Brown.  I feel confident that I can execute their recipes with good results every time and don't hesitate when their name is associated.

Love her or hate her, I'm of the belief that Martha's cookie recipes are fantastic.   I always look forward to her cookie books and seasonal cookie publications.  It was in her Holiday Cookie issue from 2006 that I first found the recipe for Pumpkin Cookies with Brown Butter Icing and I've made them dozens of times since.  People always rave about these cookies and I've made them on request countless times, shipping them to friends and family all over the country.  They are great anytime of the year, but of course they are especially appropriate for autumn, so it was an easy choice when putting together an offering for my church's bake sale table.  

The Brown Butter Icing is the star of the show.  It is a bit of a sophisticated taste - as a child I would not go near cookies with it on them, which is fairly remarkable since I am the original Cookie Monster.  Thankfully my tastes have matured and I've done a complete 360 regarding Brown Butter Icing.  It adds a nutty, almost maple flavor that is the perfect pairing with the soft cake pumpkin cookies.  The instructions call for forming these on the baking sheets with a pastry bag, but I found that using a scoop works just fine.  I bagged them up with some cute bags and made up some tags with my scrapbooking scraps, and voila'!

My husband's birthday cake wasn't such a straight forward selection.  I told him I'd make whatever he wanted and when he asked if I knew how to make Red Velvet Cake I said, sure, no problem despite the fact I'd never made one.  I've eaten plenty so I figured that qualified me well enough.    I have to be honest and say that while generally my baking efforts yield pretty good results, I have at times struggled with layer cakes made from scratch.  Technique and timing are really important and like most baking - for me at least - experience and trial and error are the best teachers.   Relatively speaking, I've not baked a lot of cakes so consequently my results and comfort level have been a little less than ideal.  I needed a no-fail option that did not involve spending $50 at my favorite bakery.

It didn't take me too long to locate Alton Brown's recipe for Red Velvet cake online.  I reviewed it and the accompanying video - which is in the way that only Alton can do entertaining and educational at the same time.  This looked to be pretty straight forward with very specific detailed instructions and the online feedback and reviews were all positive so I made my grocery list and got to work.

There are a couple of interesting things about this recipe, at least to my mind.  The recipe calls for both all-purpose and cake flour, and brown sugar rather than white, which I don't recall seeing in any cake recipes, at least none that I've used.   Because of the red food coloring, extra care is needed when working with the batter as it will stain clothes and dishrags.  Alton takes the weight vs. measure approach, so it's best to have a digital food scale when making this cake.  He also recommends taking the temperature of the cake to determine doneness which I found much preferable than the typical tester or spring back when touched methods.

As hoped, the recipe was super simple to execute and best of all, the cakes came out moist and very easy to handle with minimal crumb which meant that icing a red cake with white frosting was no problem at all.   Friends agreed that the results were delicious.  I won't hesitate to make this again and I won't even have to fib about having made it before!

These recipes can be found here:
Martha Stewart's Pumpkin Cookies with Brown Butter Icing
Alton Brown's Red Velvet Cake  (Be sure to watch the video!)

Mrs. Adams' Lemon Bars


Lemon is one of my favorite flavors in everything from Mike & Ike candies to cake so it doesn't take much persuading to get me to make up a batch of lemon anything.    A friend phoned to plan a visit and I asked what she would like for a treat to go with our tea, giving her a couple of options.  She opted for Lemon Bars and I didn't argue!

The recipe for Lemon Bars in Gram's box came from Eleanor Adams, a friend of my Gram's who lived in our small town.  I remember Mr. and Mrs. Adams well.   They owned the "Y", a small coffee counter with a weigh station located at the junction (the "Y") of the highway and the turn-off into town.  They served coffee all day and hamburgers at lunch time, but most importantly Mrs. Adams made cherry pies every day for which she was well known. I was pretty young when the Adams' retired and closed the Y but I remember sitting at the counter and asking my Dad to buy a punchboard ticket so that I could punch it out.  Apparently kids weren't supposed to do this since it was technically gambling but I just thought it was a fun game!  If you aren't familiar with punchboards there is a pretty good description on on Wikipedia that can be found by clicking here.)

Back to the Lemon Bars . . .  because of my love of this tart fruit, I've made a lot of lemon filled treats over the years and when I reviewed this recipe I was surprised to see that the lemon mixture in this recipe did not contain any butter.   This got me to wondering about the differences between lemon custard, pie filling, and curd.  Some internet research led me to the conclusion that in practice there are not a lot of hard and fast rules about these distinctions - there are a myriad of recipes and techniques that use these terms interchangeably.

There is definitely an academic distinction though and while butter is a factor, its not the defining one that I suspected it might be - curds that contain butter (not a required ingredient) have a creamier texture than filling or custards, both of which contain little or no butter.  Curd has a stronger, tarter flavor due to more juice and zest than is used in filling or custard.  The primary distinction is that filling and custard use cornstarch or flour as their thickening agent.

With that question answered and the research behind me I was more comfortable proceeding with this recipe as is knowing that it used a traditional filling type of mixture rather than a curd to top the shortbread crust.

Lemon Bars are "double baked", first the crust is pre-baked and a stove-top cooked filling is poured over the crust before putting it all back in the oven for a final bake to set the filling.  I took a couple of liberties in the preparation of this recipe - I used a food processor to make the crust and I added the zest of a lemon to the filling for just a bit more zing (have I mentioned I LOVE lemon?).  The crust has a very high proportion of butter to flour which made pressing the crust evenly into the pan a little difficult - it is very soft.  The results are worth the little extra patience needed as the resulting crust is a perfect rich, buttery compliment to the tart lemon filling.

MRS. ADAMS' LEMON BARS
Crust:
1 C butter
1/2 C powdered sugar
2 C flour
1/2 tsp salt

Filling:
4 eggs, beaten
2 C sugar
1/4 C flour
6 T lemon juice
zest of 1 lemon (optional)

Confectioner's sugar for sprinkling on top

Preheat oven to 350 degrees.  Line 9x13 pan with heavy duty foil or two layers of regular, ensuring enough hang-over on the ends to use as handles to remove the bars from pan after baking.  Grease foil generously and thoroughly with butter.  Place all ingredients for crust in the bowl of a food processor and process until dough just comes together.  Press dough evenly in prepared pan, dough will be very soft.  Bake 20 - 25 minutes until crust is lightly browned.  Remove from oven and let cool slightly.
To make filling, whisk eggs and sugar in a medium heavy saucepan over med-high heat.  Add flour, lemon juice, and zest if using and heat until thickened - the filling is done when you can make a trail through it with your finger on the back of the spoon.  Do not overcook as the filling will scorch.  Pour cooked filling over crust and bake until edges are set and center jiggles slightly, 15 - 20 minutes.  Cool completely on wire rack.  Using foil overhang, lift bars from pan and cut into squares.  Dust with confectioner's sugar before serving.


Neoma's Coffee Cake

When I found this recipe for Coffee Cake in Gram's recipe box, it got me thinking about a phrase that was very commonly used when I was growing up that I've haven't heard in years - "going visiting".   When we would go to North Dakota we would spend much of our time going visiting to catch up with as many relatives as possible.  Whether they were expecting us or not, there was always hot coffee and a sweet treat ready.

My Great Aunt Neoma was married to my Grandfather's brother Clyde and a trip to North Dakota was not complete without a stop in to see them.  I imagine one of those visits yeilded the exchange of this recipe for coffee cake.

"Coffee Cake"and "Crumb Cake" are terms that tend to be used and thought of interchangeably but there are some differences.  To further confuse things the word "Streusel" is often thrown in.  The cake batter in each of them are usually pretty similar - a basic yellow cake.  The main variation in the cake batters is the choice of dairy - sour cream, yogurt, milk, or a combination commonly used.   The choice of filling and/or topping is what technically defines the cake, although the definition is pretty loose.

Both Coffee Cake and Crumb Cake have a moist cake bottom and a cinnamon sugar topping.  As the name would suggest, the distinction between the two is that a crumb cake has a thick crumb topping - often with quite large individually distinct "crumbs".  Traditionally, Coffee Cake is more cake with a smaller amount of topping that proportionately has more sugar (usually brown) than butter and flour than the Crumb Cake topping.   Often, like in this recipe, the topping mixture is put between layers of cake in addition to the top.  The filling/topping mixture for both Crumb and Coffee Cake is frequently referred to as Streusel.  Streusel is simply a crumb topping of butter, flour, sugar and sometimes spices and nuts that can be added to any number of pastries.  The word itself is German and roughly translates to something scattered, sprinkled, or strewn.

This recipe makes a large coffee cake, I halved it and put it in a 8 inch round cake pan.  I was really pleased with the results.  The high concentration of brown sugar in the topping caramelized nicely for a rich crunchy bite that when combined with the mellow moist yellow cake made for a delicious melding of texture and flavor.   I used walnuts, but pecans or almonds would be good as well.

NEOMA'S COFFEE CAKE
1/2 C butter or shortening, softened
2 C sugar
4 eggs, beaten
1 tsp vanilla
3 C flour
1/2 tsp salt
3 tsp baking powder
1 C milk

FILLING
1 C brown sugar
2 1/2 T butter, chilled cut in 1/2 in. pieces
2 T flour
1 tsp cinnamon
1 1/2 C nuts, chopped

Preheat oven to 350 degrees.  Grease 10x18 pan or 8x8 if halving.  Using paddle attachment of stand mixer, cream butter and sugar until light and fluffy on medium speed, about 2- 3 minutes.  Reduce mixer speed to low and add eggs one at a time until fully incorporated.  Add vanilla.  In a large mixing bowl combine flour, salt and baking soda.  Add flour mixture to creamed butter in 3 additions alternating with milk starting and ending with flour.  After last addition mix until batter is smooth, about 1 minute.   To make filling, combine all ingredients in medium bowl.   Using a pastry mixer cut ingredients together until they have a coarse pea - sized meal.   Pour half of batter into prepared pan, top with half of filling mixture.  Spread remaining batter over filling and top with filling.  Bake for 40 - 50 minutes until tester comes out clean.  Cool completely on rack.