Tuesday, October 30, 2012

Bake Sales and Birthday Cakes

Although I didn't dip into Gram's recipe box last week, I did do a fair amount of baking so I'm taking a bit of a departure from my typical format for this post.  I volunteered to make some cookies for a bake sale table and it was my husband's birthday so my oven and mixer were busy!

For these endeavors, I selected recipes from two of my favorite celebrity chefs whom I feel are among the most reliable sources I've found - Martha Stewart and Alton Brown.  I feel confident that I can execute their recipes with good results every time and don't hesitate when their name is associated.

Love her or hate her, I'm of the belief that Martha's cookie recipes are fantastic.   I always look forward to her cookie books and seasonal cookie publications.  It was in her Holiday Cookie issue from 2006 that I first found the recipe for Pumpkin Cookies with Brown Butter Icing and I've made them dozens of times since.  People always rave about these cookies and I've made them on request countless times, shipping them to friends and family all over the country.  They are great anytime of the year, but of course they are especially appropriate for autumn, so it was an easy choice when putting together an offering for my church's bake sale table.  

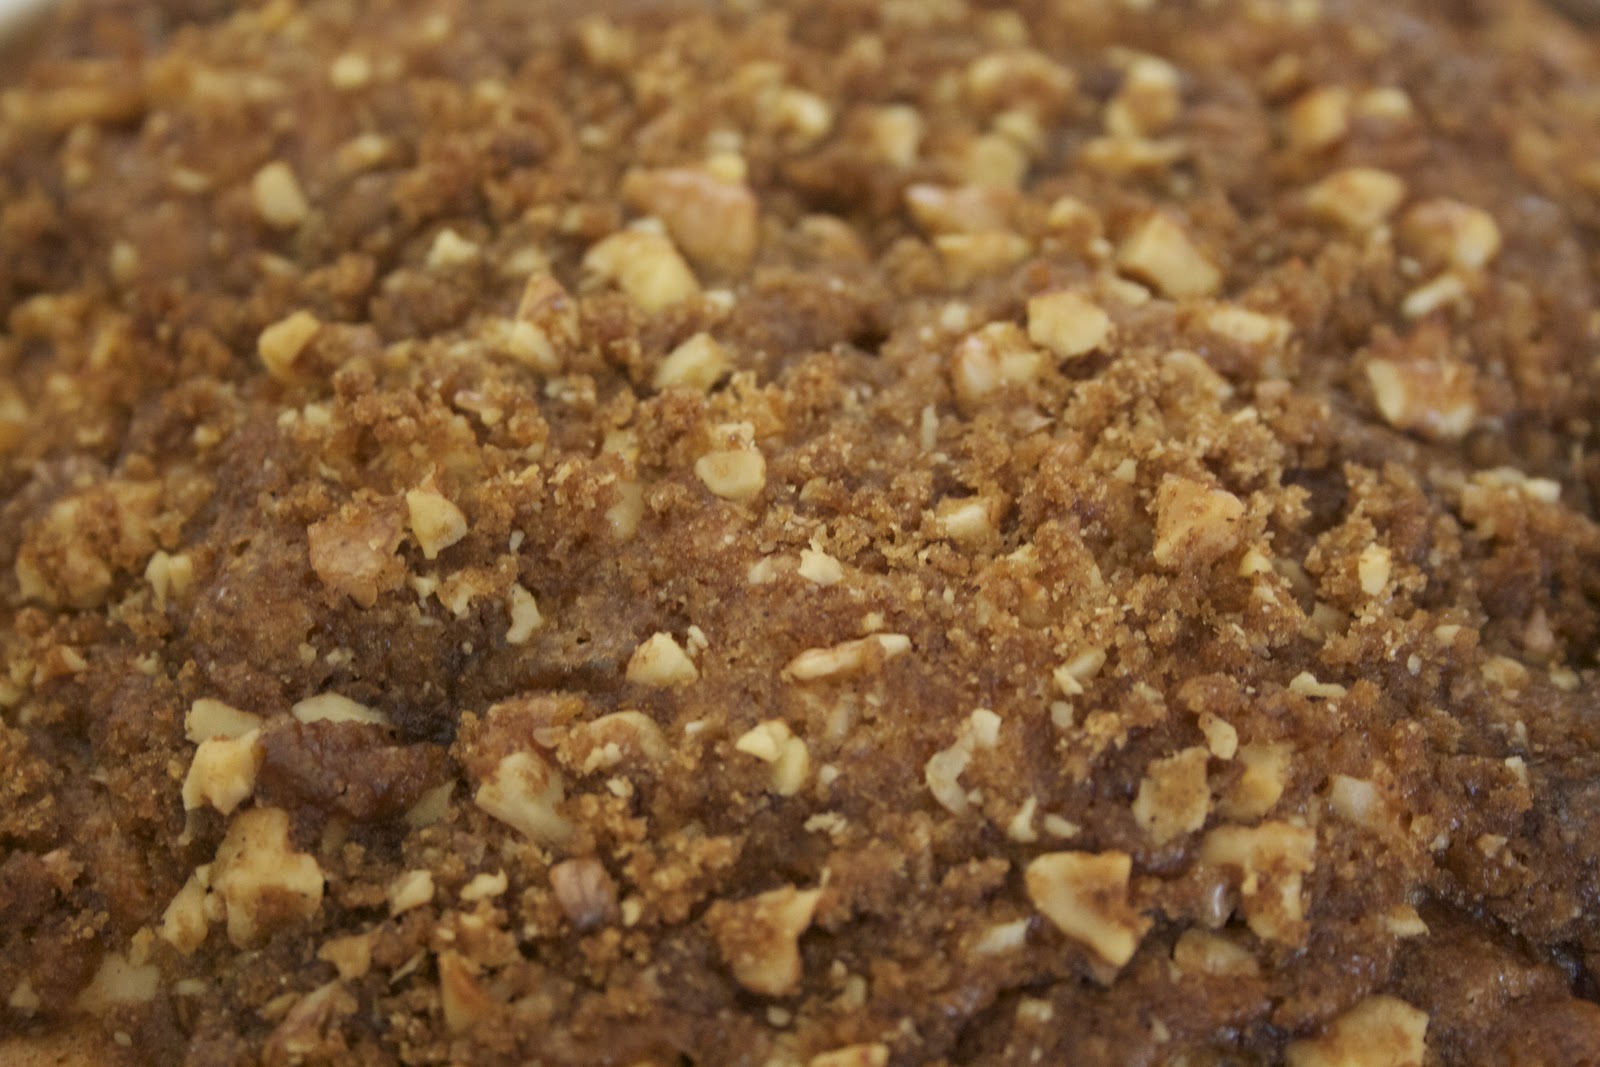
The Brown Butter Icing is the star of the show.  It is a bit of a sophisticated taste - as a child I would not go near cookies with it on them, which is fairly remarkable since I am the original Cookie Monster.  Thankfully my tastes have matured and I've done a complete 360 regarding Brown Butter Icing.  It adds a nutty, almost maple flavor that is the perfect pairing with the soft cake pumpkin cookies.  The instructions call for forming these on the baking sheets with a pastry bag, but I found that using a scoop works just fine.  I bagged them up with some cute bags and made up some tags with my scrapbooking scraps, and voila'!

My husband's birthday cake wasn't such a straight forward selection.  I told him I'd make whatever he wanted and when he asked if I knew how to make Red Velvet Cake I said, sure, no problem despite the fact I'd never made one.  I've eaten plenty so I figured that qualified me well enough.    I have to be honest and say that while generally my baking efforts yield pretty good results, I have at times struggled with layer cakes made from scratch.  Technique and timing are really important and like most baking - for me at least - experience and trial and error are the best teachers.   Relatively speaking, I've not baked a lot of cakes so consequently my results and comfort level have been a little less than ideal.  I needed a no-fail option that did not involve spending $50 at my favorite bakery.

It didn't take me too long to locate Alton Brown's recipe for Red Velvet cake online.  I reviewed it and the accompanying video - which is in the way that only Alton can do entertaining and educational at the same time.  This looked to be pretty straight forward with very specific detailed instructions and the online feedback and reviews were all positive so I made my grocery list and got to work.

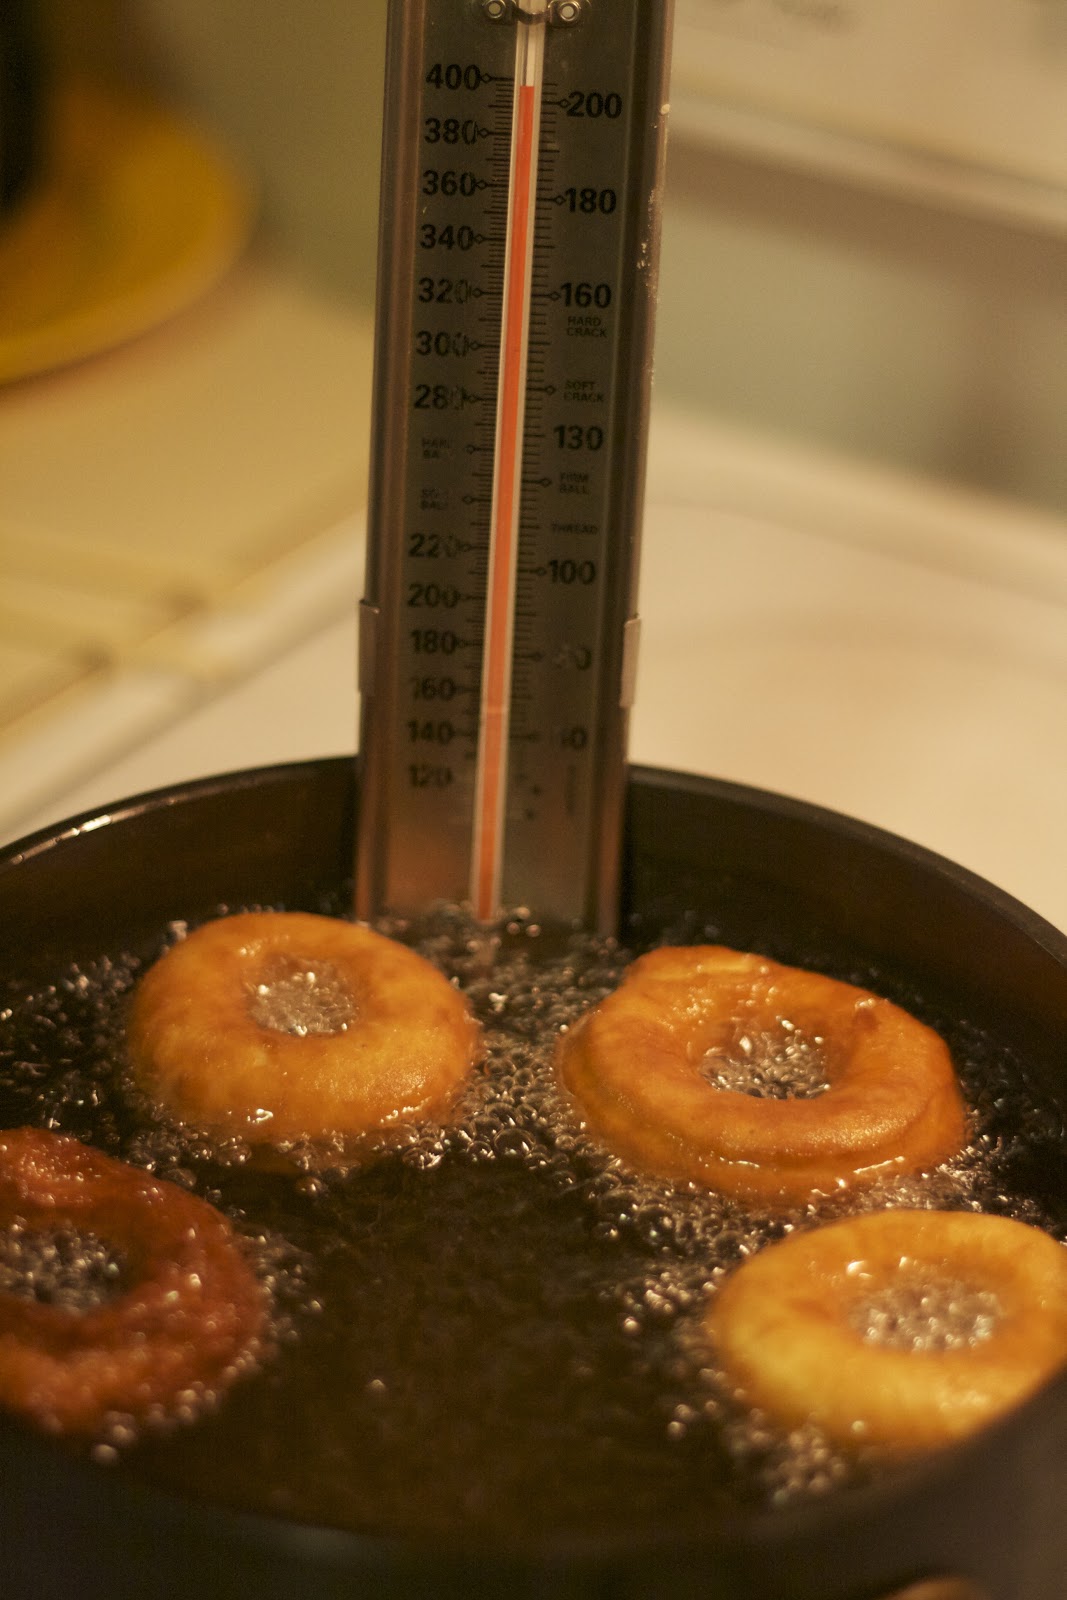
There are a couple of interesting things about this recipe, at least to my mind.  The recipe calls for both all-purpose and cake flour, and brown sugar rather than white, which I don't recall seeing in any cake recipes, at least none that I've used.   Because of the red food coloring, extra care is needed when working with the batter as it will stain clothes and dishrags.  Alton takes the weight vs. measure approach, so it's best to have a digital food scale when making this cake.  He also recommends taking the temperature of the cake to determine doneness which I found much preferable than the typical tester or spring back when touched methods.

As hoped, the recipe was super simple to execute and best of all, the cakes came out moist and very easy to handle with minimal crumb which meant that icing a red cake with white frosting was no problem at all.   Friends agreed that the results were delicious.  I won't hesitate to make this again and I won't even have to fib about having made it before!

These recipes can be found here:
Martha Stewart's Pumpkin Cookies with Brown Butter Icing
Alton Brown's Red Velvet Cake  (Be sure to watch the video!)

Mrs. Adams' Lemon Bars


Lemon is one of my favorite flavors in everything from Mike & Ike candies to cake so it doesn't take much persuading to get me to make up a batch of lemon anything.    A friend phoned to plan a visit and I asked what she would like for a treat to go with our tea, giving her a couple of options.  She opted for Lemon Bars and I didn't argue!

The recipe for Lemon Bars in Gram's box came from Eleanor Adams, a friend of my Gram's who lived in our small town.  I remember Mr. and Mrs. Adams well.   They owned the "Y", a small coffee counter with a weigh station located at the junction (the "Y") of the highway and the turn-off into town.  They served coffee all day and hamburgers at lunch time, but most importantly Mrs. Adams made cherry pies every day for which she was well known. I was pretty young when the Adams' retired and closed the Y but I remember sitting at the counter and asking my Dad to buy a punchboard ticket so that I could punch it out.  Apparently kids weren't supposed to do this since it was technically gambling but I just thought it was a fun game!  If you aren't familiar with punchboards there is a pretty good description on on Wikipedia that can be found by clicking here.)

Back to the Lemon Bars . . .  because of my love of this tart fruit, I've made a lot of lemon filled treats over the years and when I reviewed this recipe I was surprised to see that the lemon mixture in this recipe did not contain any butter.   This got me to wondering about the differences between lemon custard, pie filling, and curd.  Some internet research led me to the conclusion that in practice there are not a lot of hard and fast rules about these distinctions - there are a myriad of recipes and techniques that use these terms interchangeably.

There is definitely an academic distinction though and while butter is a factor, its not the defining one that I suspected it might be - curds that contain butter (not a required ingredient) have a creamier texture than filling or custards, both of which contain little or no butter.  Curd has a stronger, tarter flavor due to more juice and zest than is used in filling or custard.  The primary distinction is that filling and custard use cornstarch or flour as their thickening agent.

With that question answered and the research behind me I was more comfortable proceeding with this recipe as is knowing that it used a traditional filling type of mixture rather than a curd to top the shortbread crust.

Lemon Bars are "double baked", first the crust is pre-baked and a stove-top cooked filling is poured over the crust before putting it all back in the oven for a final bake to set the filling.  I took a couple of liberties in the preparation of this recipe - I used a food processor to make the crust and I added the zest of a lemon to the filling for just a bit more zing (have I mentioned I LOVE lemon?).  The crust has a very high proportion of butter to flour which made pressing the crust evenly into the pan a little difficult - it is very soft.  The results are worth the little extra patience needed as the resulting crust is a perfect rich, buttery compliment to the tart lemon filling.

MRS. ADAMS' LEMON BARS
Crust:
1 C butter
1/2 C powdered sugar
2 C flour
1/2 tsp salt

Filling:
4 eggs, beaten
2 C sugar
1/4 C flour
6 T lemon juice
zest of 1 lemon (optional)

Confectioner's sugar for sprinkling on top

Preheat oven to 350 degrees.  Line 9x13 pan with heavy duty foil or two layers of regular, ensuring enough hang-over on the ends to use as handles to remove the bars from pan after baking.  Grease foil generously and thoroughly with butter.  Place all ingredients for crust in the bowl of a food processor and process until dough just comes together.  Press dough evenly in prepared pan, dough will be very soft.  Bake 20 - 25 minutes until crust is lightly browned.  Remove from oven and let cool slightly.
To make filling, whisk eggs and sugar in a medium heavy saucepan over med-high heat.  Add flour, lemon juice, and zest if using and heat until thickened - the filling is done when you can make a trail through it with your finger on the back of the spoon.  Do not overcook as the filling will scorch.  Pour cooked filling over crust and bake until edges are set and center jiggles slightly, 15 - 20 minutes.  Cool completely on wire rack.  Using foil overhang, lift bars from pan and cut into squares.  Dust with confectioner's sugar before serving.


Neoma's Coffee Cake

When I found this recipe for Coffee Cake in Gram's recipe box, it got me thinking about a phrase that was very commonly used when I was growing up that I've haven't heard in years - "going visiting".   When we would go to North Dakota we would spend much of our time going visiting to catch up with as many relatives as possible.  Whether they were expecting us or not, there was always hot coffee and a sweet treat ready.

My Great Aunt Neoma was married to my Grandfather's brother Clyde and a trip to North Dakota was not complete without a stop in to see them.  I imagine one of those visits yeilded the exchange of this recipe for coffee cake.

"Coffee Cake"and "Crumb Cake" are terms that tend to be used and thought of interchangeably but there are some differences.  To further confuse things the word "Streusel" is often thrown in.  The cake batter in each of them are usually pretty similar - a basic yellow cake.  The main variation in the cake batters is the choice of dairy - sour cream, yogurt, milk, or a combination commonly used.   The choice of filling and/or topping is what technically defines the cake, although the definition is pretty loose.

Both Coffee Cake and Crumb Cake have a moist cake bottom and a cinnamon sugar topping.  As the name would suggest, the distinction between the two is that a crumb cake has a thick crumb topping - often with quite large individually distinct "crumbs".  Traditionally, Coffee Cake is more cake with a smaller amount of topping that proportionately has more sugar (usually brown) than butter and flour than the Crumb Cake topping.   Often, like in this recipe, the topping mixture is put between layers of cake in addition to the top.  The filling/topping mixture for both Crumb and Coffee Cake is frequently referred to as Streusel.  Streusel is simply a crumb topping of butter, flour, sugar and sometimes spices and nuts that can be added to any number of pastries.  The word itself is German and roughly translates to something scattered, sprinkled, or strewn.

This recipe makes a large coffee cake, I halved it and put it in a 8 inch round cake pan.  I was really pleased with the results.  The high concentration of brown sugar in the topping caramelized nicely for a rich crunchy bite that when combined with the mellow moist yellow cake made for a delicious melding of texture and flavor.   I used walnuts, but pecans or almonds would be good as well.

NEOMA'S COFFEE CAKE
1/2 C butter or shortening, softened
2 C sugar
4 eggs, beaten
1 tsp vanilla
3 C flour
1/2 tsp salt
3 tsp baking powder
1 C milk

FILLING
1 C brown sugar
2 1/2 T butter, chilled cut in 1/2 in. pieces
2 T flour
1 tsp cinnamon
1 1/2 C nuts, chopped

Preheat oven to 350 degrees.  Grease 10x18 pan or 8x8 if halving.  Using paddle attachment of stand mixer, cream butter and sugar until light and fluffy on medium speed, about 2- 3 minutes.  Reduce mixer speed to low and add eggs one at a time until fully incorporated.  Add vanilla.  In a large mixing bowl combine flour, salt and baking soda.  Add flour mixture to creamed butter in 3 additions alternating with milk starting and ending with flour.  After last addition mix until batter is smooth, about 1 minute.   To make filling, combine all ingredients in medium bowl.   Using a pastry mixer cut ingredients together until they have a coarse pea - sized meal.   Pour half of batter into prepared pan, top with half of filling mixture.  Spread remaining batter over filling and top with filling.  Bake for 40 - 50 minutes until tester comes out clean.  Cool completely on rack.


Tuesday, October 9, 2012

Mrs. Fosse's Sugar Cookies

There are two recipes for Sugar Cookies in Gram's collection and I remember her making both of them.  Even as a kid with not so discerning tastes I could differentiate the two - one was delicate, had a fine crumb and was paler in color.  The other was a bit more rustic and coarse, it was yellower and browned more on the edges and bottoms.   I didn't have a favorite, I liked them both equally.

I chose to make this one first for sentimental reasons - it was a recipe Gram got from my Great Grandmother on the other side of the family - Ethel Newton Smith Fosse - my Mom's Grandmother.  The two sides of our family often spent holidays and special occasions together.  These occasions resulted in joint efforts in cooking and baking which in turn resulted in some recipe exchanges.  Gram liked this one so much she put it into her regular cookie rotation.  I'll be posting a couple more of these "cross-family" recipes in the future.

This recipe requires cutting the fat into dry ingredients
The preparation of this cookie calls for a step that I don't think I've ever used in cookie baking before - cutting together the fat and dry ingredients like you would when making a pie crust.  I'm sure the texture of the crumb is a direct result of this technique.  The recipe calls for lemon extract which gives the cookies a delicious hint of citrus.  If you really like that flavor adding some fresh lemon zest would make a nice addition.  Regarding fat for this recipe, it calls for 1 cup of margarine, but when the ingredients are so limited in a cookie such as this I really prefer a bit of rich buttery flavor so I made them with 1/2 cup butter and a 1/2 cup margarine.  I opted for a 50/50 split so as to keep some moisture and prevent them from being too rich.

Cream of Tartar is commonly used in Sugar Cookie recipes, but what is it?  I vaguely remembered from Home Ec., Science, Nutrition, and some Culinary classes that it was a stabilizer, often used when beating egg whites for things like meringue to help keep the egg whites nice and firm.   I also know that it is a component of baking powder, so I thought perhaps it has a leavening property.  I have assumed that this leavening effect is why it is called for in Sugar Cookies.

Upon a quick Google search, I got some claification hereCream of Tartar is sometimes used " . . . with recipes containing baking soda.  Baking soda is a leavening agent that needs an acid to activate it.  (I'm sure just about everyone has had experience with the "volcano" projects in school that have an eruption caused by a combination of baking soda and vinegar.)  It's often used in recipes that involve creaming butter and sugar together, because this process creates tiny air bubbles in the mixture that can be expanded by the addition of baking soda and an acid.  Baking powder is basically baking soda with acids already added, but some recipes call for baking soda and cream of tarter rather than baking powder, because the baking powder generally has an additional acid that activates further leavening when the batter or dough is heated in the oven.  (Most baking powders are labeled "double-action" or something similar that indicates the presence of the two different acids.  "Single-action" baking powder would just be a combination of baking soda and cream of tartar.)"

I further found that Cream of Tartar's scientific name is potassium bitartrate, also known as potassium hydrogen tartrate, has formula KC4H5O6, is a byproduct of winemaking. It is the potassium acid salt of tartaric acid, a carboxylic acid.  Here is a link to some more interesting information about Cream of Tartar.  There is your chemistry lesson for the day!  

While I'm a bit of a purist in that if you put a plate of sugar cookies that have both plain sugar and colored sugar on them, I'd choose the plain ones.  My husband on the other hand likes the colorful ones.  I have a dearth of colored sugars in my pantry and I thought I may as well use them so I did a bit of both.  I found that the coarser sanding sugars are harder to work with, and required that you partially flatten the cookie first, then sprinkle the colored sugar on the flattened cookie, then press the cookie again to adhere the sugar.  

R - flattened to 1/8 inch, L - flattened to 3/8 inch.

Speaking of flattening the cookies, I found that how much you flatten them varies the results quite a bit.  The first sheet I made I flattened to about 3/8 in.  These cookies puffed up in the center thanks to the above mentioned baking soda and cream of tarter, and stayed soft in the middle.  After the first sheet I flattened them to a thin 1/8 in, which still had a bit of a rise, but made a nice flat crisp cookie.

MRS. FOSSE'S SUGAR COOKIES

3 C flour
2 tsp. cream of tartar
1 tsp. soda
1 C margarine (I used 1/2 C margarine, 1/2 C butter) chilled, cut into 1/2 in. pieces
2 eggs beaten
2 tsp vanilla
1 tsp lemon extract
1 C sugar, plus extra for rolling
Colored sugars for decorating (optional)

Preheat oven to 375 degrees.  Whisk together first 3 ingredients in large bowl, add margarine (and butter if using).  Using pastry blender, cut ingredients together until they form a sandy texture.   Set aside.  Using stand or hand mixer combine sugar, eggs, and flavorings until well mixed.  Add flour mixture to egg mixture and beat until just combined.  Using 1 in. scoop make cookies, smooth with  hands, then roll in sugar.  Place on cookie sheet 1 - 2 inches apart, and flatten to 1/8 inch thickness with the bottom of a glass. (I find it is easier to flatten if you dip your glass in sugar after flattening every 2 cookies).  Bake 10 - 15 minutes.  Remove from sheets and cool on rack.

Doughnuts

A couple of years ago my Dad mentioned that Gram made really good cake doughnuts.  I vaguely remembered her making them, but Dad said she'd made them regularly when he was young, particularly when friends were over or when cousins were in town visiting.  This conversation stuck in my head but I knew there was not a recipe for doughnuts in the recipe box I have.

When my parents planned a recent trip to visit my family, I thought it would be really fun to make some doughnuts as a special treat for my Dad who is after all, one of the original coffee breakers.  I remembered that Gram had a big deep kitchen drawer full of cookbooks so I asked my Mom if she still had them.  She said she thought so and would try to bring some with her when they came.  I wasn't super hopeful that we'd find the recipe that my Dad remembered but I figured it was worth a shot.


When my parents arrived, I didn't even let them get their bags upstairs before I demanded to see the cookbooks Mom had dug up.  She handed me just one - imagine my disappointment - it was a thin book called "All About Home Baking".  Mom told me that she thought I'd really enjoy this book and that her family had one when she was a kid too - they called it the "Checkerboard Cookbook" because the front cover is a black and yellow plaid pattern.   I started looking through it and she was right - this book was great!  It was originally published in 1933 (Gram's copy was the 3rd edition from '37) by General Foods Corporation, so naturally it features all GF products - Calumet Baking Powder, Swans Down Flour, Diamond Crystal Salt, Baker's Chocolate and Coconut, etc.   "All About Home Baking" is not just a cookbook - the first chapter is titled "It's A Wise Woman Who Knows Her Baking Rules".  These rules are 6 tips that still very relevant today all these years and advances later:
  1. Be Orderly
  2. Use Good Tools
  3. Choose Good Ingredients
  4. Measure Accurately
  5. Mix Carefully
  6. Know Your Pans and Oven, and How to Cool Your Cakes
My favorite section is called "Some Bright New Menu Ideas For the Hostess".  Here's a sample Bright New Menu Idea For "A Delicious Springtime Luncheon":
Consomme'
Paprika Crackers   Green Olives
Grilled Sweetbreads on Toast Points
New Asparagus with Hollandaise Sauce
Novelty Rolls or Lemon Biscuits
Watermelon Circles
Fresh Strawberry Tarts or Ribbon Cake
Pastel Candies
Coffee

What could be more appropriate or more festive for dessert than these Fresh Strawberry Tarts?  They sustain the guests' interest even after such very tempting fare as sweetbreads and asparagus.

This book was published during the Great Depression, but apparently the marketing folks at General Foods didn't get the memo!  There is a blog that mentions this book and shows some of the contents - check it out here.

As I was paging through "All About Home Baking" there were a few recipes that had been clipped from newspapers tucked in here and there, but the book was very clean and didn't look worn at all.  I was beginning to think that Gram must not have used it much, when I came to a page that made me stop dead in my tracks - it had grease splattered on it, and at the bottom was the holy grail I'd been searching for - the Doughnut recipe.  I couldn't believe my eyes, what a great stroke of luck!

Two evenings later after dinner, my Mom reluctantly agreed to make a batch of doughnuts with me.  (While my Mom is quite a good cook and baker, she hates to do either).  My Dad was so excited we couldn't keep him out of the kitchen, and my husband kept shaking his head and mumbling something about the Peterson family's unhealthy obsession with baked goods.

We were all sure that Gram had used lard to fry them in so I had picked some up.  I rarely deep fry anything but over a year ago I had bought a digital fryer for some occasion that came and went without me getting it out of the box, so I thought this was a great opportunity to get it out and take it for a test drive.  After realizing that it would have taken at least 5 pounds of lard to meet the minimum for the fryer and further realizing that solid fats were not recommended, we reverted back to a simple heavy pot on the stovetop and put my fancy fryer back in the box.  

The recipe is simple and economical - the primary ingredients are flour, sugar, and milk.  Lard is a whopping $1.59 at my local grocery store.   It has a bit of nutmeg and lemon extract which are subtle but lovely in the doughnuts.  We finished them off by sugaring some in plain granulated sugar, a sugar/cinnamon mix, and a few in confectioner's sugar.  Confectioner's sugar didn't do well on the warm doughnuts, it turned into a damp gooey mess, but when sprinkled on cooled doughnuts was great.  My favorite was the cinnamon sugar.

As with any frying, there is a fried food smell that lingers - we kept the oven fan running and a few windows open to help alleviate that and it worked pretty well. While you would want small children to steer clear when doing the frying, sugaring would be a great fun job and an excellent way to involve them.  

Three Generations of Coffee Breakers
Working with my Mom in the kitchen was really a treat - we tag teamed the rolling, cutting, frying, and sugaring like a well oiled machine!  The result was about 3 1/2 dozen delicious doughnuts and countless family memories - some from long ago and some brand new ones too.  This was truly a very special installment in my Coffee Break excursion!


DOUGHNUTS

4 C sifted flour + 1 C for kneading
4 tsp Calumet baking powder
1/2 tsp salt
1/4 tsp nutmeg
1 C sugar
2 eggs, well beaten
2 T melted butter or other shortening
1 C milk
1/4 tsp lemon extract

Sift flour once, measure, add baking powder, salt and nutmeg and sift together 3 times.  Combine sugar and eggs; add shortening.  Add flour, alternately with milk, a small amount at a time.  (I did this in three parts)  Beat after each addition until smooth.  Add flavoring.  Knead lightly on slightly floured board.  Roll 1/3 inch thick.  Cut with floured doughnut cutter.  Fry in deep fat (385 degrees F.) until golden brown, turning frequently.  Drain on unglazed paper.  Sugar if desired (by shaking warm doughnuts in paper bag with sugar).  Makes 4 dozen small doughnuts.


Friday, September 21, 2012

Chocolate Sandwiches


I need to start this entry with a confession.  I ate four of these cookies for breakfast yesterday morning.  Yes, FOUR.  I'm not prone to that type of sugar crazed bingeing, but this cookie is just that good.  It had been so long since I'd had them that I didn't remember how fantastic they are - the results really blew me away.  Gram didn't make these very often, maybe because they have a couple of steps and take a bit longer to make than a standard cookie does, or maybe because she had the same binging problem I did and just didn't want the temptation!

TO WHOOPIE OR NOT TO WHOOPIE?
I knew that I needed to get these cookies out of my house so I took a couple of plates to friends.  One commented that they looked like cute little mini Whoopie Pies.    Although I grew up in the Western U.S., I knew that Whoopie Pies are an East Coast tradition - Maine and Pennsylvania fight over where the Whoopie orginates from (see info on the origin controversy here) - it got me wondering about how close to a Whoopie Pie was this?

As it turns out, very close - there are small differences in the cookie recipe - Gram's calls for both baking powder and soda, white sugar rather than brown, and 1/2 C of cocoa rather than 1/4 as the majority of traditional Whoopie Pie recipes do.  It seems that the filling has a singular ingredient that makes them special - marshmallow fluff.   Gram's filling recipe calls for a bit more powdered sugar and some milk which I didn't see in any Whoopie Pie recipes I found.  There is more Whoopie Pie history here - it's pretty interesting.

I never heard of Whoopie Pies until I moved to the East Coast a decade ago, so I'll stick to calling Gram's version Chocolate Sandwiches, or better yet, what my Brother and I used to call them - "Homemade Oreos".  That isn't technically the most accurate description since the chocolate part of the cookie is really like cake rather than a crisp biscuit, but hey, we were five.

With Halloween coming up I thought these would be cute with a little orange food coloring added to the filling.  Along that vein, you could add green for St. Patrick's Day, maybe even adding some mint extract.  Enjoy the possibilities!

CHOCOLATE SANDWICHES
1/2 C shortening (I used margarine)
1 C sugar
1 egg
1 tsp vanilla
1 C whole milk
2 C flour
1/2 tsp baking powder
1 1/2 tsp soda
1/2 tsp baking soda
1/2 tsp salt
1/2 C cocoa

FILLING
1/2 C shortening (I used butter)
2 C powdered sugar
1 C marshmallow whip (sometimes called "fluff" or "creme")
1 tsp vanilla
1 T whole milk

Preheat oven to 375 degrees.  Using the whisk attachment for either a stand or handheld mixer (this is a batter rather than a dough), cream shortening and sugar until light and fluffy, then add egg and mix until fully incorporated.  In a large mixing bowl, whisk together dry ingredients.  Add flour mixture in two parts to butter mixture, alternating with milk until batter is thoroughly mixed.  Add vanilla.   Using 1" scoop, drop batter 2 inches apart on prepared cookie sheet, keeping keep batter drops as round and similar in size as possible.   Bake for 10 - 12 minutes, let cool on sheet before moving to cooling rack.

To make filling, cream shortening and powdered sugar with stand or handheld mixer on low speed.  Add marshmallow whip, milk and vanilla, beating until fully combined.  Spread generous amount of filling on cookie bottom and put together to make sandwiches.   Makes about 2 1/2 dozen sandwich cookies.


Thursday, September 13, 2012

Molasses Cookies

When I started school, my regular participation in our family coffee breaks ended.  Thankfully Gram and I started our own after school snack time.  My favorite memory of Molasses Cookies is introducing them to the girl who would become my long-time best friend on our first day of Kindergarten.   When school ended that first day, my future BF was waiting for her Mom to come pick her up.  At five years old I knew that some of my Gram's cookies and a glass of milk was far preferable to waiting around the school yard for your ride, so I gathered her up and we walked the three blocks to Gram's.  Molasses Cookies were in the cookie jar that day.  Thankfully it was small town so it didn't take long for my new best friend's mom to find her!

Most people would probably call these Oatmeal Raisin Cookies, our family has always called them Molasses Cookies.   The recipe came from the Home Ec. class that either my Uncle or my Dad would have taken in the 1950's.  

Having made this cookie before, I knew there were a few experiments I wanted to make.  Gram's version was soft and cakey but my preparation using the recipe as written has always resulted in a dense chewy cookie - delicious but not the cookie I was hoping for.

In an effort to get closer to Gram's Molasses Cookie, I did a bit of research on how to achieve a more cakey style of cookie.  I'd assumed that Gram just added flour, maybe an egg.  It's my belief she added flour to almost all of her cookies.  I found a lot of information out there, apparently there a number of ways to achieve this.  I found a great link to an episode of Food Network's Good Eats where Alton Brown demonstrates the science behind crispy, chewy, and cakey cookies.  Alton is always entertaining and informative, check it out here.

I decided I would experiment in two ways - the type of cookie sheet I used and by adding flour.  Using a dark sheet required some modifications to the preparation - I lowered the oven temperature from 400 degrees to 350, and reduced the cooking time from 14 minutes to 9.  I found that the darker cookie sheet did result in less "spread" of the cookie, but the cookie was not noticablely cakier, just denser.  Another problem with using the dark sheet was that the bottoms got too brown for my liking even when placing the sheet on the upper oven rack when baking.

On to my second modification - adding flour.  I started adding by 1/4 cup at a time and started to see the cookie I was shooting for.  Ultimately I ended up adding an additional full cup of flour to achieve the consistency I remembered Gram's being.  Thankfully all iterations tasted just fine!

MOLASSES COOKIES
1 C shortening
2 C sugar
3 eggs
3/4 C molasses
3 - 4 C flour
2 tsp soda
2 tsp salt
2 tsp cinnamon
4 C oatmeal
2 C raisins

Preheat oven to 350 degrees.  Cream sugar and shortening with handheld or stand mixer until light and fluffy.  Add eggs one at a time until fully incorporated.  Whisk together dry ingredients including oatmeal in large bowl.  Slowly add flour mixture to shortening mixture until well mixed.  Stir in raisins.  Using 1" scoop, place dough on parchment lined cookie sheets.  Bake for 12 - 15 minutes.


Using the dark sheet with and without parchment
The end result after adding 3/4 Cup flour - almost there!

From L to R - (1) Recipe as Written (2) Using Dark Sheet
(3) With Additional 1/2 C Flour (4) With Additional 1 C Flour 

Bottoms of Cookies


Friday, September 7, 2012

Peanut Butter Cookies

This week's selection is a request from my husband.  Truthfully, Peanut Butter was his second choice - his first was Chocolate Chip.  That request forced me into an admission I was hoping I wouldn't have to make quite so soon.  My deep dark cookie secret is that my Gram's Chocolate Chip Cookies were pretty mediocre.  My Mom's were far superior - softer, chewier, and with more chocolate chips.  There, I've written it out loud, the only criticism of my dear sweet Gram I've ever made.

My Mom also made these Peanut Butter Cookies, so I'm not sure which of them originated the recipe, but both made them quite well.  So many Peanut Butter cookies - especially those commercially prepared - are so soft and chewy I often think they are undercooked.  They frequently leave a grease spot on your napkin big enough to require industrial grade oil spill clean up material.  Yuck!   I really like this version - they are soft in the middle, a little more crispy - delicate even - towards the outside edges.  They are fun to make too - I remember I loved getting to make the fork indentations when I was a kid.

PEANUT BUTTER COOKIES
1 C shortening
1 C sugar + some for rolling
1 C brown sugar
2 eggs
1 C peanut butter
1 tsp vanilla
3 C flour
2 tsp baking soda
2 tsp salt

Preheat oven to 375 degrees.  Cream shortening and sugars until light and fluffy, add egg until combined, then add peanut butter and vanilla, mixing until fully incorporated.  Sift in dry ingredients, mixing until just combined.   Make cookies using 1 inch scoop, then make dough into balls with hands. Roll dough balls in sugar and place on parchment lined baking sheet.  With fork, press dough to flatten cookie, then again to create a cross-hatch pattern.  Bake cookies 12 - 14 minutes until golden brown.  Transfer to wire racks to cool.


Wednesday, September 5, 2012

Coconut Oat Crispies

With this recipe I came up against something I expected would happen eventually, aside from all this baking being counterproductive to my post baby weight loss efforts!   One of the purposes of my baking efforts is to replicate my Gram's goodies.  I expected that the effect of elevation on baking would prevent my results from being exact recreations since my current location is just above sea level at 717 feet, whereas my hometown is at 4100 feet.   I assume that Gram's recipes had already been adapted for high elevation baking.  (Good info on high elevation baking can be found here.)  Also, I've come to suspect that Gram often added flour, and perhaps even occasionally an egg to certain recipes to make them have a "cakier" consistency that she preferred.

For me, these cookies turned out moister and chewier than those I remember from childhood.  They are however, absolutely delicious, and because they have oatmeal, I like to consider them a health food!  They are great with coffee or milk.  I used margarine rather than shortening.

COCONUT OAT CRISPIES
1 C brown sugar
1 C white sugar
1 C shortening  (see notes on Ginger Snap entry for more info about shortening)
2 C coconut
1 C oatmeal
1 tsp baking powder
1 tsp soda
1 tsp vanilla
2 eggs
2 C flour

Preheat oven to 350 degrees.  Combine dry ingredients in large bowl and set aside.  Cream sugars and shortening until light and fluffy with hand or stand mixer with paddle attachment.  Add eggs one at a time until well incorporated.   Slowly add dry ingredients until just combined.  Using 1 inch scoop, form cookies and place on parchment lined cookie sheets.  Bake for 10 - 14 minutes until light brown around edges.  Transfer to rack to cool.  Makes about 6 1/2 dozen.


Ginger Snaps

Scandinavians love their spiced sweets in a variety of forms.  Gram's recipe box has cards for three different types of ginger cookies along with a number of spiced breads and cakes.  Thankfully these are flavors I love, so I'm looking forward to trying them all!  First up is the classic Ginger Snap Cookie.   I would have a really hard time picking a favorite cookie from when I was a kid but these Ginger Snaps would definitely be in contention.   I think they were my Gram's favorite too, but she would have never made such an admission.

These are crispy snaps not soft chewy ones (I do have a recipe for those that will be posted at a later time) and are the quintessential dunking cookie.  I didn't develop a taste for coffee until college, but Gram used to pour just a tiny bit for me to dunk these in.  I would submerge them for just the right amount of time to be sure that the cookie didn't get so saturated that it broke off and fell of into my cup, then I would suck out the ginger sweetened coffee before biting into the coffee soaked cookie.  Mmm, delicious!

I experimented a bit with the rolling sugars - I rolled half in regular granulated sugar, and the other half in courser demerara sugar.  In a very unscientific poll the verdict was split.  I preferred the delicacy of the regular sugar probably due to my taste memories of these cookies, but my husband and a few friends liked the texture the demerara sugar added to the cookie.  You can't miss either way!  Next time I make these I may further experiment using flavored sugar, perhaps orange, cinnamon, or ginger.   I made these prior to deciding to do the blog, so sorry, no pics for this one.

CRISPY GINGER SNAPS
4 C flour
2 T ginger
4 tsp baking soda
2 tsp cinnamon
1 tsp salt
1 1/2 C shortening (see notes below)
2 C sugar
2 eggs
1/2 C molasses
Sugar for rolling

Preheat oven to 350 degrees.  Whisk dry ingredients in large bowl and set aside.  Cream shortening and sugar until light and fluffy with hand or stand mixer.  Add eggs one at a time to shortening mixture until combined, then add molasses.  Slowly incorporate dry ingredients until just combined.  Separate dough into 2 - 3 equal parts and wrap in plastic.  Refrigerate for at least 2 hours.  

Working with refrigerated dough one portion at a time (leave remaining parts in fridge until ready to use), use 1" scoop to form cookie, then shape with hands, and roll in sugar. Bake 14 - 16 minutes, transfer to wire rack to cool.  Makes about 8 1/2 dozen cookies.

THE SHORT STORY ON FATS
Many of Gram's recipes call for shortening, which strictly speaking is vegetable shortening, brand-named CRISCO.  I don't remember Gram using Crisco for baking, however I'm sure she must have at times.  Typically, I believe she substituted margarine for shortening.  I did a bit of research on this - if interested Google "substitutions for shortening in recipes" and you'll get a dearth of information - and learned that when substituting margarine or butter for shortening you should add 1 tablespoon per cup to accommodate for the water content in margarine and butter.   So in this recipe, use 1 1/2 C + 1 1/2 Tablespoons (4 1/2 tsp) butter or margarine.

I used margarine in keeping with my recollections of what Gram did, but when I have the time, I plan to make batches with each shortening, margarine, and butter and do a bit of a side by side taste test.  I will post my findings.

Mrs. Paulson's Banana Bread

My first recipe selection was made due to the fact that I had some very ripe bananas needing to be used up.  Alice would appreciate the practicality of my choice!

I've been making this recipe for years, so I have had my own written version for a while.  When I looked at the original from Gram's box, I noticed something that I did not remember - the recipe came from Mrs. Paulson.  Mrs. Paulson was Gram's Mother In-Law, my Great Grandmother.

This is a simple basic recipe for banana bread, it has a nice moist and dense consistency and good banana flavor.   It takes no time at all to whip up, and could easily be made in pinch as long as you have ripe bananas on hand.

The recipe makes 2 loaves.  I used two different style pans, and found that the pan choice made a big difference in the outcome.  I used one of my fancy heavy non stick loaf pans, and an old smaller, lighter, thinner pan, that actually had been Gram's.   It is about 7.5x4x2, made of aluminum, and is similar to the pan found at this link.  I preferred the results from her pan - the loaf baked more evenly and was consequently moist throughout where as the larger pan required a longer cooking time, and the bread was more "well done" on the bottom - darker in color and dryer.  A bonus is that the smaller pan has rounded corners and it is much easier to clean.


Many recipes for banana bread call for cinnamon, this does not but 1/2 to 1 tsp could be added for a little extra goodness.  Gram would never, ever have put chocolate chips in her banana bread but I think that chocolate and bananas were made for one another, so you could replace the nuts with 1 cup of semi-sweet chocolate chips for a sweeter and delicious bread.

MRS. PAULSON'S BANANA BREAD
1 C sugar
1/2 C butter
2 eggs
3 T sour milk (Who keeps sour milk on hand anymore?  This can be made by adding a couple drops of lemon juice or vinegar to the milk and let it set for a few minutes.)
3 mashed very ripe bananas
1 tsp baking soda
1 tsp salt
2 C flour
1 C nuts

Preheat oven to 350 degrees, grease and flour two loaf pans.

Cream sugar and butter until light and fluffy with handheld or stand mixer.  Add eggs one at a time until fully incorporated, then add milk and bananas to mixture.  Combine remaining dry ingredients in a large bowl and combine well, then add slowly to banana mixture and beat on low until just combined.  Divide batter into prepared pans.

Bake 45 - 1 hour until tester comes out clean.

Coffee Breaks at Gram's


This blog is inspired by my Grandmother Alice Peterson's recipe box.  I was fortunate to inherit that recipe box, and several years ago while perusing it, I thought of the idea of making something from it each week.  Reliving childhood memories in the form of warm cookies and the smell of spices flooding my kitchen was tempting but my life didn't really allow for much baking time so the idea was tabled.  

I've recently become a stay at home mom looking for a project (or perhaps a distraction!).   I never intended to formalize my little baking expeditions but I was convinced by some friends there may be a broader interest, so I've started taking photos and making notes on my efforts.

A bit of background for some explanation of how I got here.  I grew up living next door to Grandma and Grandpa Pete (as we called them when needing to differentiate between sets of grandparents) which meant that not only did my older brother or I ever have a babysitter, we always had an alternative if we didn't like what our mom was fixing for dinner!  Gram took her role as housewife and grandmother very seriously.  She was a Norwegian married to a Swede, so twice daily coffee breaks complete with a freshly baked sweet was genetically mandated.

Grandma was a good cook and a very good baker.  She was not a gourmet, nor did any of her recipes call for fancy or expensive ingredients, complicated techniques or equipment.  There were no gadgets in her kitchen, except perhaps the ricer, used to make lefse, a wonderful Norwegian soft flatbread made with potatoes. All of her dishes and recipes were very simple but delicious.  I don't know that any of her recipes were her own creations, some may have been, but most came from friends and family, community cookbooks, the back of packages, or even the local newspaper. 

The plan is that more or less each week I will dip into Gram's recipe box and make something to go along with my morning and afternoon coffee breaks (no matter how hard I've tried, these breaks are habits I just have not been able to shake).  I will post the recipes, notes, some photos and perhaps a bit of commentary.  I may experiment with some, where as others will be best left to a purist approach.  I'm so looking forward to my time in the kitchen with Gram looking over my shoulder!  I welcome any thoughts, comments, ideas, and suggestions.